Future of Clothing Repair: 5 DIY Techniques for 2 More Years
The shift toward sustainability in the United States is turning DIY clothing repair from a niche hobby into a mainstream environmental necessity.
As consumers move away from disposable fashion, mastering simple repair techniques has become a powerful way to reduce waste and personal expenses.
This update explores five essential DIY methods that can extend the life of your favorite pieces by up to two years.
We break down the latest industry trends, official data on textile waste, and the practical skills you need to join the “repair revolution” today.
Embracing Visible Mending: A Creative Approach to Repair
Visible mending transforms flaws into features, celebrating the repair process rather than hiding it.
This technique involves using contrasting threads or fabrics to mend tears, holes, and worn areas, making the repair a deliberate and decorative element of the garment.
It challenges the notion that clothing must be perfect and encourages an appreciation for the story each piece tells.
This approach moves beyond mere functionality, injecting personality and artistry into repaired items.
By intentionally showcasing the mend, individuals can express creativity while extending the life of their clothing.
Visible mending techniques include Sashiko stitching, decorative patches, and contrasting embroidery, all contributing to unique, personalized garments.
The rising popularity of visible mending reflects a broader cultural shift towards appreciating craftsmanship and individuality. It offers an accessible entry point for beginners, as technical perfection is less critical than creative expression.
This technique significantly contributes to The Future of Clothing Repair: 5 DIY Techniques That Can Extend Your Favorite Pieces’ Life by 2 Years. by making repairs fashionable.
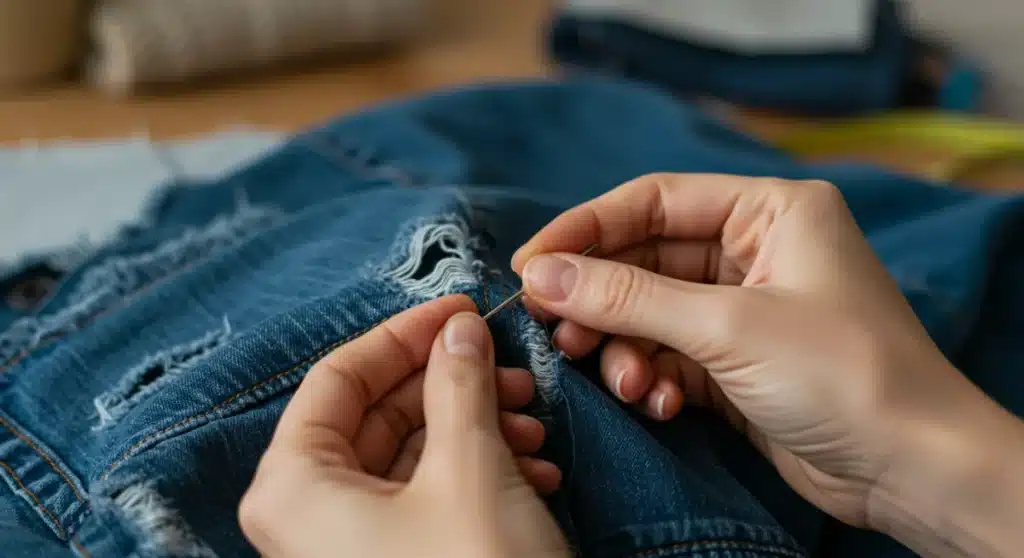
Sashiko Stitching for Strength and Style
Sashiko is a traditional Japanese mending technique that uses simple running stitches to reinforce fabrics. It is particularly effective for denim and other sturdy materials, providing both structural integrity and a distinctive aesthetic.
The repetitive patterns of Sashiko create a beautiful texture while strengthening the worn area.
To begin Sashiko, select a contrasting thread, typically white on indigo, and a long needle. Mark your desired pattern, often geometric, onto the fabric, then pass the needle in and out of the fabric in small, even stitches.
The result is a durable and visually appealing repair that adds character to the garment.
- Choose a strong, contrasting thread.
- Mark geometric patterns for guidance.
- Use a long needle for efficient stitching.
- Ensure even stitch length for best results.
Decorative Patchwork for Personalization
Decorative patchwork involves applying fabric patches over holes or worn areas, often incorporating different textures or patterns.
This method is highly versatile, allowing for endless creative possibilities. Patches can be embroidered, appliquéd, or simply sewn on to cover damage, turning a defect into a design element.
When selecting patches, consider the garment’s fabric and overall style. You can use scraps from old clothes, purchase pre-made patches, or even create your own designs.
Secure the patch with a running stitch or a more elaborate embroidery stitch, ensuring it is firmly attached and aesthetically pleasing.
This technique is a cornerstone of The Future of Clothing Repair: 5 DIY Techniques That Can Extend Your Favorite Pieces’ Life by 2 Years..
- Select fabric patches that complement or contrast.
- Utilize embroidery to enhance patch edges.
- Secure patches firmly to prevent fraying.
- Experiment with different patch shapes and sizes.
Mastering Basic Hand Sewing: Essential Stitches for Everyday Repairs
Basic hand sewing skills are fundamental to extending the life of any garment, addressing common issues like loose seams, minor tears, and detached buttons.
These simple stitches are easy to learn and require minimal equipment, making them accessible to everyone. Developing proficiency in these techniques empowers individuals to perform quick, effective repairs at home.
Understanding just a few essential stitches can save countless items from the discard pile. A simple needle and thread, along with a thimble, are often all that is needed to tackle most minor garment malfunctions.
This foundational knowledge is critical for anyone committed to sustainable fashion and making their wardrobe last.
From securing a hem to reattaching a button, these basic hand sewing techniques are invaluable for maintaining clothing integrity.
They represent a practical and immediate way to engage with The Future of Clothing Repair: 5 DIY Techniques That Can Extend Your Favorite Pieces’ Life by 2 Years., ensuring favorite pieces remain wearable for longer.
The Running Stitch and Backstitch for Seams
The running stitch is a basic, versatile stitch used for gathering, basting, and simple seams, offering flexibility and ease.
The backstitch, on the other hand, provides a much stronger and more durable seam, closely resembling machine stitching. Combining these two stitches allows for a range of repair needs, from temporary fixes to permanent closures.
For a running stitch, simply weave the needle in and out of the fabric in a continuous line. For a backstitch, bring the needle up, then back down a short distance behind the previous stitch, creating an overlapping line of stitches.
The backstitch is ideal for repairing popped seams or reinforcing stress points on garments.
- Use running stitch for quick, temporary repairs.
- Employ backstitch for durable, strong seams.
- Ensure even stitch length for a neat finish.
- Practice on scrap fabric to build confidence.
Button Replacement and Securing
Loose or missing buttons are common issues that can quickly render a garment unwearable. Learning how to reattach a button securely is a simple yet highly effective repair that restores functionality and extends item life.
This technique requires only a needle, thread, and the replacement button itself.
To sew on a button, thread your needle and make a small knot at the end. Push the needle through the fabric from the back, then through one of the buttonholes. Repeat this process several times, creating a strong attachment.
For buttons with a shank, wrap the thread around the base to create a sturdy stalk, preventing the button from pulling too tightly against the fabric.
This skill is vital for The Future of Clothing Repair: 5 DIY Techniques That Can Extend Your Favorite Pieces’ Life by 2 Years..
- Always use strong thread for buttons.
- Create a thread shank for buttons without one.
- Ensure the button is aligned correctly.
- Double-knot the thread securely at the end.
Darning Socks and Knits: Preventing Further Wear
Darning is an age-old technique specifically designed for repairing holes in knitted items like socks, sweaters, and scarves.
It involves weaving new yarn into the damaged area to create a new fabric section, effectively filling the hole and preventing it from enlarging. This method is particularly useful for areas subject to friction, like heels and elbows.
The beauty of darning lies in its ability to seamlessly integrate the repair into the existing knit structure.
While it requires patience, the skill is relatively easy to master with practice, yielding professional-looking results. Darning not only extends the life of cherished knitwear but also preserves its original comfort and feel.
By preventing small holes from becoming unmanageable, darning plays a crucial role in maintaining the integrity of knit garments.
It’s an indispensable skill for anyone committed to sustainable fashion practices and a core component of The Future of Clothing Repair: 5 DIY Techniques That Can Extend Your Favorite Pieces’ Life by 2 Years..
The Classic Weave Darn Technique
The classic weave darn involves creating a grid of stitches across the hole, effectively re-creating the fabric. Start by stitching parallel lines across the hole in one direction, extending slightly beyond the edges of the damage.
Then, weave perpendicular lines through these stitches, alternating over and under, to create a strong, interlocked patch. This technique is especially good for socks.
It is important to use a darning needle and yarn that matches the original garment’s fiber content and weight as closely as possible. Using a darning egg or mushroom inside the item can help maintain tension and shape during the repair process.
This technique ensures a comfortable and durable fix for your knitwear, directly contributing to extending its life.
- Use matching yarn and a darning needle.
- Work on a darning egg or mushroom.
- Create a grid of horizontal and vertical stitches.
- Ensure stitches are tight but don’t pull the fabric.
Zipper Repair and Replacement: Functional Fixes
Faulty zippers are a common frustration that often leads to garments being discarded prematurely, despite the rest of the item being in perfect condition.
Learning how to perform basic zipper repairs, or even full replacements, can salvage many otherwise functional pieces of clothing. This skill is invaluable for jackets, pants, and bags.
Often, a zipper issue is not a complete breakage but a minor misalignment or a loose slider that can be easily fixed. Addressing these problems promptly can prevent further damage and avoid the need for a more complex replacement.
With a few tools and a bit of patience, many zipper problems can be resolved at home.
From reattaching a slider to replacing the entire zipper, these techniques are essential for restoring functionality to garments.
Mastering zipper repair is a practical step towards extending the usability of clothing, aligning perfectly with the principles of The Future of Clothing Repair: 5 DIY Techniques That Can Extend Your Favorite Pieces’ Life by 2 Years..
Fixing a Misaligned Zipper or Slider
A common zipper problem is when the teeth separate behind the slider, or the slider itself comes off one side. For a misaligned zipper, try to gently pull the slider back to the start of the zipper, realigning the teeth.
If the slider has come off, it can often be reattached using pliers to carefully guide it back onto both sides of the zipper track. This simple fix can save a garment.
For a loose slider, which causes the zipper to open spontaneously, gently squeeze the back of the slider with pliers. This tightens its grip on the teeth, preventing it from slipping. Always apply gentle pressure to avoid breaking the slider.
These minor adjustments can significantly extend the functional life of a zipper without needing a full replacement.
- Gently realign zipper teeth if separated.
- Use pliers to reattach a detached slider.
- Tighten a loose slider by squeezing its base.
- Test the zipper carefully after repair.
Full Zipper Replacement for Extensive Damage
When a zipper is extensively damaged, such as broken teeth or a completely irreparable slider, a full replacement is often the best solution. This involves carefully removing the old zipper using a seam ripper and then sewing in a new one.
While more involved, this repair is achievable with basic sewing skills and a sewing machine.
Choose a new zipper of the correct length and type (e.g., separating for jackets, non-separating for pants). Pin the new zipper in place, ensuring it is properly aligned, then stitch it securely using a zipper foot on your sewing machine.
This comprehensive repair breathes new life into a garment that would otherwise be discarded, showcasing a key aspect of The Future of Clothing Repair: 5 DIY Techniques That Can Extend Your Favorite Pieces’ Life by 2 Years..
- Remove the old zipper carefully with a seam ripper.
- Select a new zipper of the appropriate length and type.
- Pin the new zipper precisely for correct alignment.
- Use a zipper foot for accurate machine stitching.
Hemming and Seam Repair: Maintaining Garment Structure
Hems and seams are crucial to a garment’s structure and appearance, and damage to these areas can quickly diminish its wearability.
Learning to repair fallen hems, loose seams, and minor tears along stress points ensures that clothing retains its intended shape and finish. These repairs are often straightforward and can be performed with minimal sewing experience.
A well-maintained hem prevents fraying and keeps garments looking neat and tailored, while strong seams ensure the structural integrity of the piece.
Addressing these issues promptly not only extends the life of the clothing but also enhances its overall presentation. These foundational repairs are essential for any wardrobe.
From a simple hand-stitched hem to reinforcing a strained seam, these techniques are vital for preserving the longevity and aesthetic appeal of your clothing.
They are practical applications of The Future of Clothing Repair: 5 DIY Techniques That Can Extend Your Favorite Pieces’ Life by 2 Years., making a tangible difference in garment lifespan.
Re-hemming and Blind Stitching
A fallen hem can make a garment look unkempt and lead to further fabric damage. Re-hemming can be done by hand or machine, depending on the fabric and desired finish.
For a virtually invisible hand-stitched hem, the blind stitch is ideal. This stitch catches only a few threads of the main fabric, creating a discreet hold.
To perform a blind stitch, fold the hem allowance into place and secure it with pins. Work from right to left, picking up a small thread from the main fabric, then passing the needle through the folded hem fabric.
The stitches should be loose enough to avoid puckering but secure enough to hold the hem. This technique is perfect for formal wear and delicate fabrics, extending their usable life.
- Press the hem neatly before stitching.
- Use a matching thread for inconspicuous repairs.
- Catch minimal fabric for a truly blind stitch.
- Ensure even spacing between stitches for a clean look.
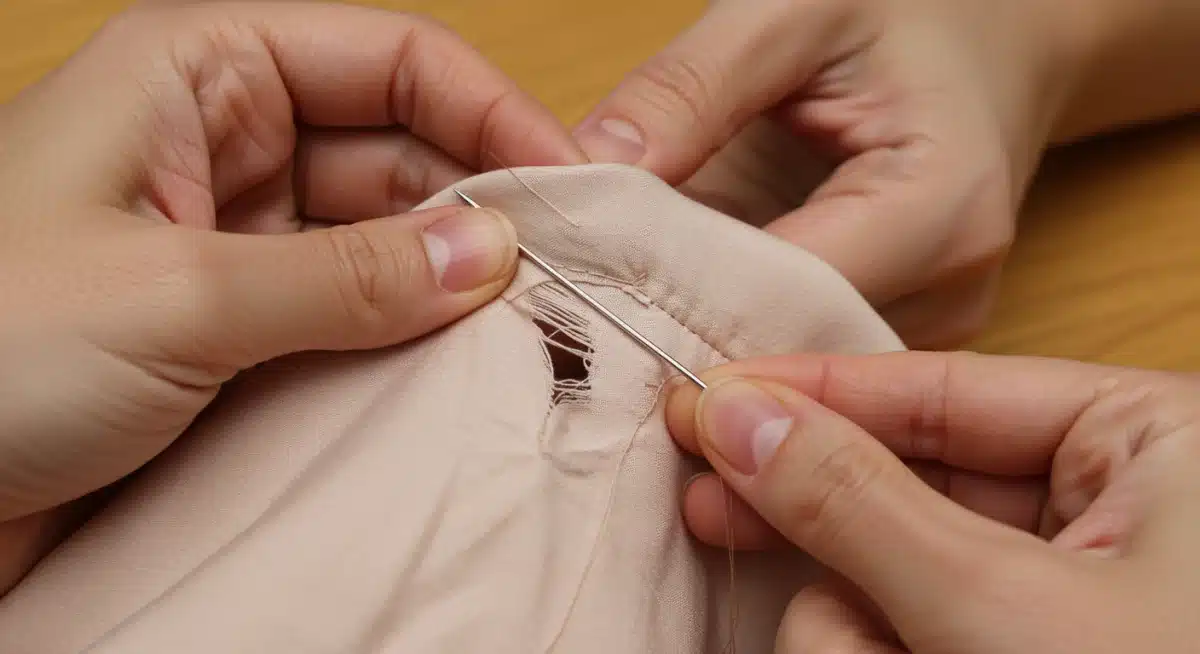
Reinforcing Weak Seams and Small Tears
Seams often bear the brunt of daily wear and tear, leading to stretching, loosening, or small tears. Reinforcing these weak points before they become major problems can significantly extend a garment’s life.
This involves stitching over the existing seam, either by hand with a backstitch or by machine, to add extra strength.
For small tears along a seam, use a close backstitch to mend the opening, ensuring the original seam line is maintained.
For areas under high stress, such as armholes or crotches, consider adding a small patch on the inside of the garment to distribute tension.
These preventative and restorative measures are key to practicing The Future of Clothing Repair: 5 DIY Techniques That Can Extend Your Favorite Pieces’ Life by 2 Years. effectively.
- Identify stress points and reinforce them proactively.
- Use a strong thread that matches the fabric.
- Employ a backstitch for maximum seam durability.
- Consider internal patches for high-stress areas.
| Repair Technique | Benefit |
|---|---|
| Visible Mending | Transforms damage into decorative features, adds character. |
| Basic Hand Sewing | Fixes common issues like loose seams and missing buttons easily. |
| Darning Knits | Repairs holes in knitted items, preventing further unraveling. |
| Zipper Repair | Restores functionality to garments with faulty zippers. |
Frequently Asked Questions About Clothing Repair
Clothing repair significantly reduces textile waste, a major environmental concern. By extending the lifespan of garments, we decrease the demand for new production, which conserves resources like water and energy, and lessens pollution from manufacturing processes. It fosters a circular economy approach to fashion.
With consistent application of these five DIY techniques, a garment’s life can realistically be extended by two years or more. Simple fixes like darning socks or reattaching buttons prevent minor damages from escalating, ensuring items remain wearable and functional for a much longer period.
Yes, all five techniques highlighted are designed to be accessible for beginners. They require minimal tools and basic hand-eye coordination. With a little practice, anyone can master these repairs, making it easier to engage with The Future of Clothing Repair: 5 DIY Techniques That Can Extend Your Favorite Pieces’ Life by 2 Years. and prolong their clothing’s usability.
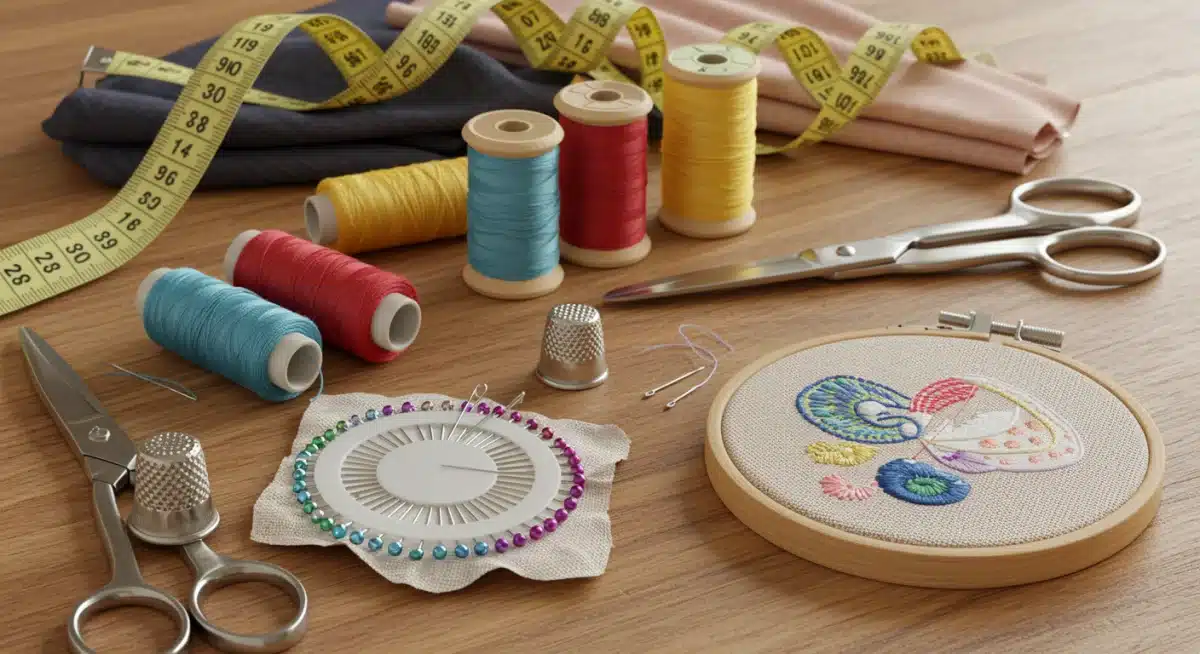
Essential tools include a variety of hand-sewing needles, quality thread in basic colors, fabric scissors, a seam ripper, a thimble, and possibly a darning egg or mushroom for knits. Pliers can also be useful for zipper repairs. These basic items form a comprehensive repair kit.
Many online platforms offer tutorials and workshops for advanced repair skills, including YouTube, craft blogs, and sustainable fashion communities. Local sewing classes and community centers also provide hands-on learning opportunities. These resources can further enhance your ability to contribute to The Future of Clothing Repair: 5 DIY Techniques That Can Extend Your Favorite Pieces’ Life by 2 Years..
Looking Ahead
The movement towards prolonging garment life through DIY repair is more than a trend; it’s a fundamental shift in consumer behavior.
These five techniques represent accessible pathways for individuals to contribute to a more sustainable fashion ecosystem.
As awareness grows, the adoption of such practical skills will undoubtedly redefine our relationship with clothing, fostering greater appreciation and reducing environmental impact.
The future of clothing repair is bright, empowering conscious choices and driving the urgent need for a repair revolution.


